Part 1. Install and configure ParallelCluster
Note
For WINDOWS USERS:
Please proceed with the rest of this lab in WSL, unless stated otherwise. Please install the Linux version of miniconda in WSL and create a conda environment called aws using the command in Step 6 of Lab 2 and activate the environment before starting on this lab. If after installing miniconda and creating a new Terminal window does not show the "(base)" prompt, you might have to do the following:
cd ~/
ln -s ~/.bashrc ~/.bash_profile
before creating a new Terminal window again.
1.
Use pip to install the AWS ParallelCluster software:
(aws) $ pip install aws-parallelcluster --upgrade --user
2.
You will also need to install nvm, a version manager for Node.js here, as it is used by AWS ParallelCluster CLI.
Scroll to the section on Installing and Updating to install nvm. You might need to reload the .bashrc (or equivalent file if you are not using the bash shell) file after installation by doing:
(aws) $ source ~/.bashrc
Once you are done, you can do the following to check that nvm is installed properly:
(aws) $ nvm --version

0.40.3
You can now use nvm to install Node.js:
(aws) $ nvm install node
You can do the following to make sure it is installed properly:
(aws) $ node --version

v24.6.0
3.
Edit your shell’s config file (e.g. ~/.bash_profile, ~/.zshrc, ~/.bashrc) using the nano editor:
(aws) $ nano ~/.bash_profile
to add pcluster’s directory ~/.local/bin to your shell’s $PATH variable by adding the following line at the end of the file:
export PATH="/Users/shihcheng/.local/bin:$PATH"
Note
Replace the portions
/Users/shihcheng/of the path with those appropriate for your home directory. To do that you should:$ cd ~ $ pwd /your/home/directory/path
Save and exit the nano editor by typing Ctrl-x, followed by y to save the file, and Return to use the same filename.
4.
Reload your shell’s config file (replace with .zshrc or .bashrc as necessary):
(aws) $ source ~/.bash_profile
or:
(aws) $ . ~/.bash_profile
This will reset your conda environment, so you should reactivate your aws environment:
(base) $ conda activate aws
5.
Check that you can run pcluster, and get the version number returned:
(aws) $ pcluster version

{
  "version": "3.11.1"
}
6.
You will now create a configuration file for pcluster in your home directory:
(aws) $ pcluster configure --config ~/cluster-config.yaml
Select these answers to the prompts:
AWS Region ID: ap-southeast-1
EC2 Key Pair Name: MyKeyPair
Scheduler: slurm
Operating System: alinux2
Head node instance type: t2.micro
Number of queues: 1
Name of queue 1: queue1
Number of compute resources for queue1: 1
Compute instance type for compute resource 1 in queue1: t2.micro
Maximum instance count: 10
Automate VPC creation? (y/n): y
Availability Zone: ap-southeast-1a
Network Configuration: Head node and compute fleet in the same public subnet
Wait until the program completes the setup.
7.
Edit the configuration file created by the command above:
(aws) $ nano ~/cluster-config.yaml
8.
In the HeadNode section, find the entry for InstanceType:
HeadNode:
  InstanceType: t2.micro
9.
In order to avoid running out of one particular type of instance, insert the instance type from the table below according to the last number before the letter in your student number (e.g. use the number 4 if your student number is A0171234X):
| Number | Instance Type | Number | Instance Type | Number | Instance Type |
|---|---|---|---|---|---|
| 0 | t3a.nano | 4 | t3.micro | 8 | t3.medium |
| 1 | t3.nano | 5 | t3a.small | 9 | c5a.large |
| 2 | t2.nano | 6 | t3.small | ||
| 3 | t3a.micro | 7 | t3a.medium |
10.
Do the same for Name and InstanceType in the Scheduling section:
Scheduling:
  Scheduler: slurm
  SlurmQueues:
  - Name: queue1
    ComputeResources:
    - Name: t3a-nano
      InstanceType: t3a.nano
Warning
The
Namefield can only take letters, digits, and hyphens, so replace the period in the instance type with a hyphen when entering it into theNamefield, e.g.t3a-nanoinstead oft3a.nano.
11.
Add the following after the Scheduling section (use copy and paste to avoid typos):
SharedStorage:
  - MountDir: data
    Name: ee3801
    StorageType: Ebs
    EbsSettings:
      Size: 1000
      Encrypted: false
      SnapshotId:
Leave the SnapshotId field empty for now. You will enter this information later after you have created a copy of the snapshot we have created for you. This will give you access to the data you will be processing for the remaining labs, which is stored as a Elastic Block Storage snapshot on AWS. The MountDir setting means that the files and directories in the snapshot can be found in the /data directory on your cluster.
12.
Some AWS Organization accounts block creating Route 53 hosted zones. ParallelCluster tries to create a private hosted zone by default, which will cause Step 16 to fail with AWS::Route53::HostedZone CREATE_FAILED (AccessDenied).
To prevent this, disable managed DNS in your config now:
- Edit
~/cluster-config.yaml. - Under
Scheduling, insert the following block exactly underSlurmSettings(indentation matters):
Scheduling:
  Scheduler: slurm
  SlurmSettings:
    Dns:
      DisableManagedDns: true
      UseEc2Hostnames: true
Note
Heads-up: after disabling managed DNS, when you start an interactive compute shell with
srun --pty /bin/bashin step 47, your prompt will show the default EC2 hostname (e.g. ip-10-0-10-43) instead of a Slurm node alias (e.g. queue1-dy-m54xlarge-1).
Check your config file by doing:
(aws) $ cat ~/cluster-config.yaml
which should look like the following (except the instance type should follow the instructions from above):
Region: ap-southeast-1
Image:
  Os: alinux2
HeadNode:
  InstanceType: t3a.nano
  Networking:
    SubnetId: subnet-xxxxxxxxxxxxxxxxx
  Ssh:
    KeyName: MyKeyPair
Scheduling:
  Scheduler: slurm
  SlurmSettings:
    Dns:
      DisableManagedDns: true
      UseEc2Hostnames: true
  SlurmQueues:
  - Name: queue1
    ComputeResources:
    - Name: t3a-nano
      InstanceType: t3a.nano
      MinCount: 0
      MaxCount: 10
    Networking:
      SubnetIds:
      - subnet-xxxxxxxxxxxxxxxxx
SharedStorage:
  - MountDir: data
    Name: ee3801
    StorageType: Ebs
    EbsSettings:
      Size: 1000
      Encrypted: false
      SnapshotId:
Check carefully for typos as they will cause problems in the subsequent steps.
13.
Before we create a cluster, which might take 10 minutes or more depending on how busy AWS is, we will use the Simple Notification System on AWS to notify you when the cluster is ready:
(aws) $ aws sns create-topic --name awsnotify
which should return something like the following (with a different AWS ID number):
{
    "TopicArn": "arn:aws:sns:ap-southeast-1:123456789012:awsnotify"
}
Copy the TopicArn number (123456789012 in the example above) created for you so you can use it in the subsequent commands.
Subscribe to the topic by using the following command (which should be entered in one line with no line breaks, paste the TopicArn number above into the command below, and change the email address abcde@nus.edu.sg to your email address):
(aws) $ aws sns subscribe --topic-arn arn:aws:sns:ap-southeast-1:123456789012:awsnotify --protocol email --notification-endpoint abcde@nus.edu.sg

{
    "SubscriptionArn": "pending confirmation"
}
You should then receive a subscription confirmation email with a link that you can click to confirm your subscription.
You can then send a test message by doing (replace the TopicArn number):
(aws) $ aws sns publish --topic-arn arn:aws:sns:ap-southeast-1:123456789012:awsnotify --message "test"

{
    "MessageId": "2fb0a38d-2aeb-5336-a517-fa374b3c7ce4"
}
Check your email to see that you received the test message successfully to verify that the notification system has been set up properly.
We can create a shell function to make it easier to send notifications by adding the following to the end of your shell config file (e.g. ~/.bash_profile, ~/.bashrc, ~/.zshrc, etc.):
awsnotify() {
	aws sns publish --topic-arn arn:aws:sns:ap-southeast-1:123456789012:awsnotify --message "$1"
}
Reload the configuration file by doing:
(aws) $ source ~/.bash_profile

(base) $ conda activate aws
and test it by doing:
(aws) $ awsnotify test2
If you receive an email with the message test2 after a few minutes, it means you have successfully created a shell function to make sending AWS notifications easier.
14.
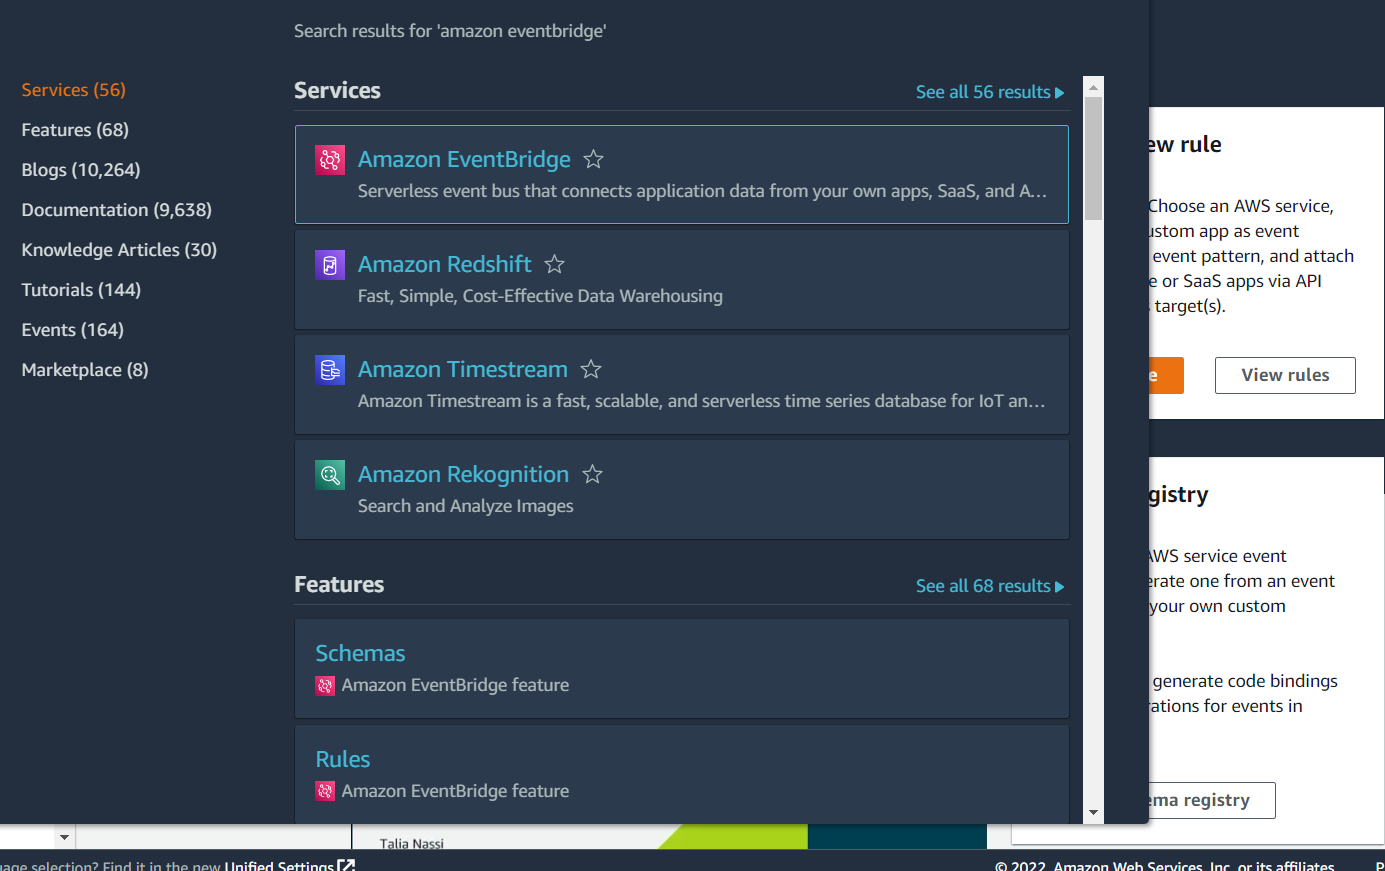
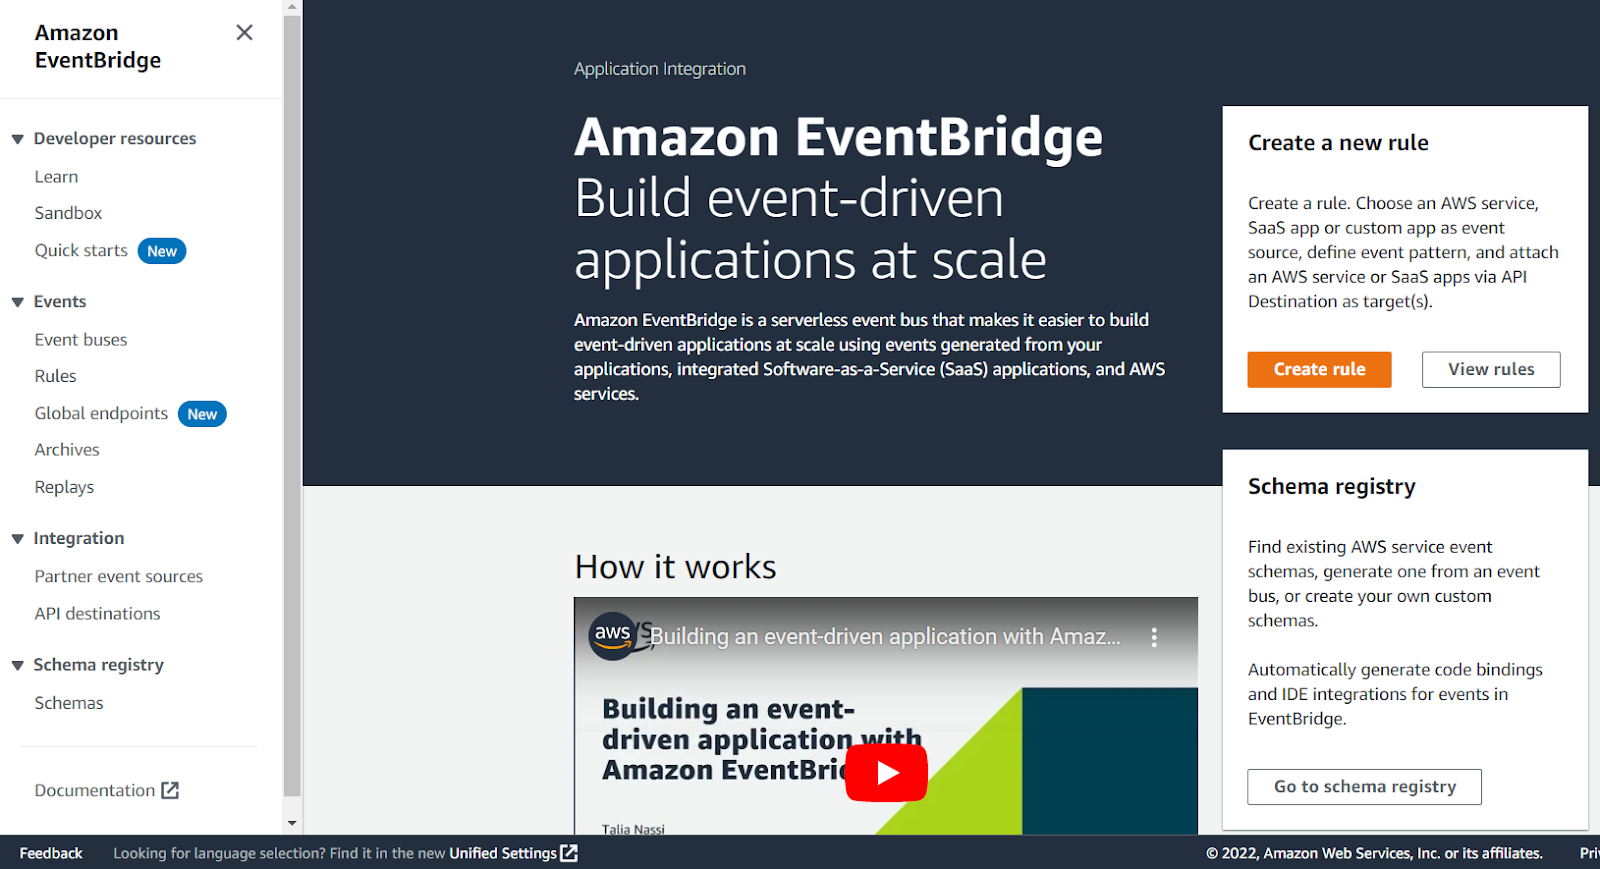
We will now use the EventBridge service in AWS to notify you once your cluster is set up, so login to your AWS console.
Type Amazon EventBridge into the search bar at the top, and click on Amazon EventBridge in the drop-down list:
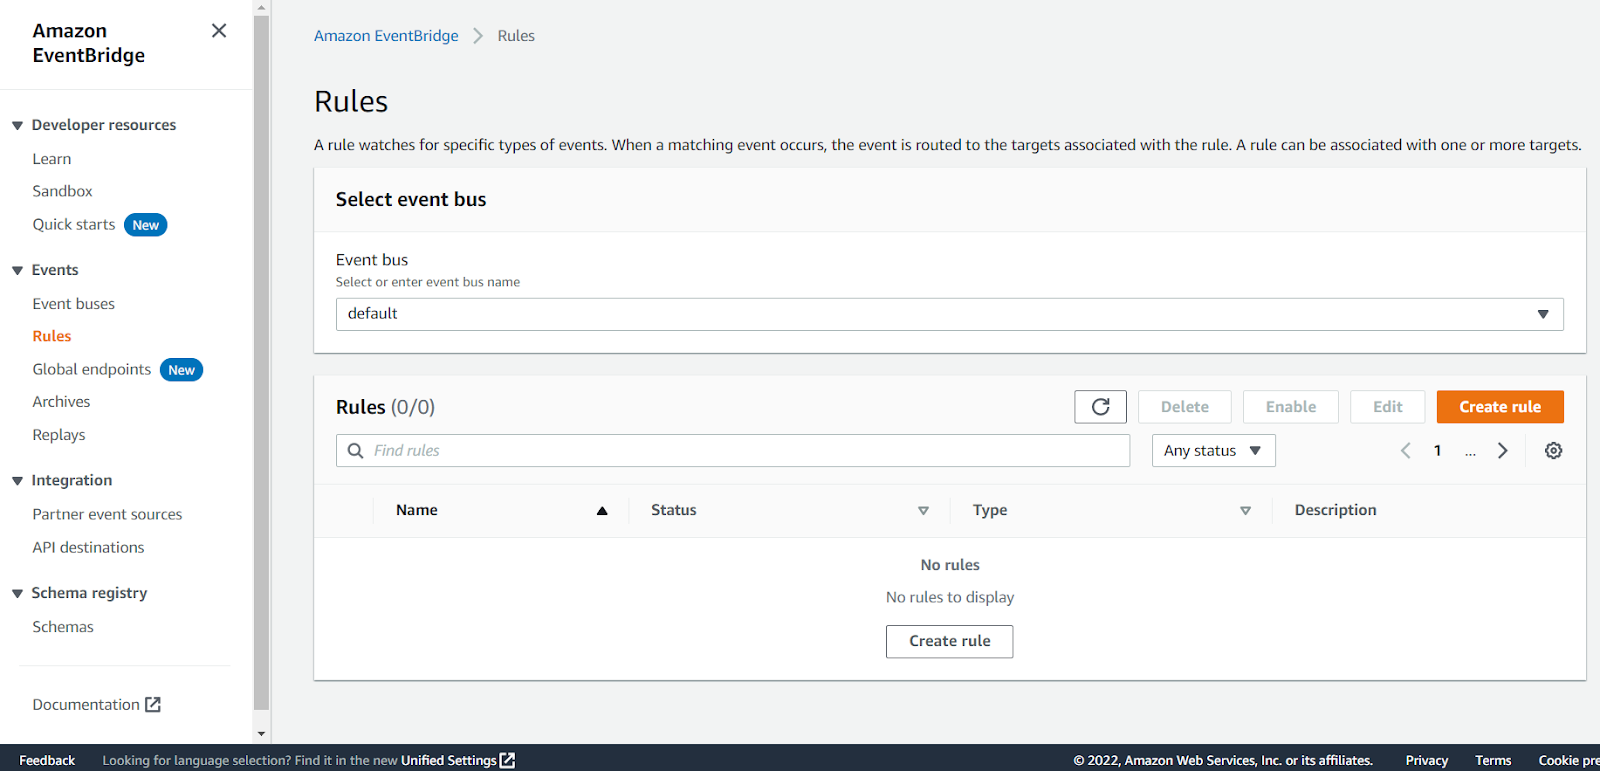
Click on Rules in the panel on the left:
Click on the Create rule button:
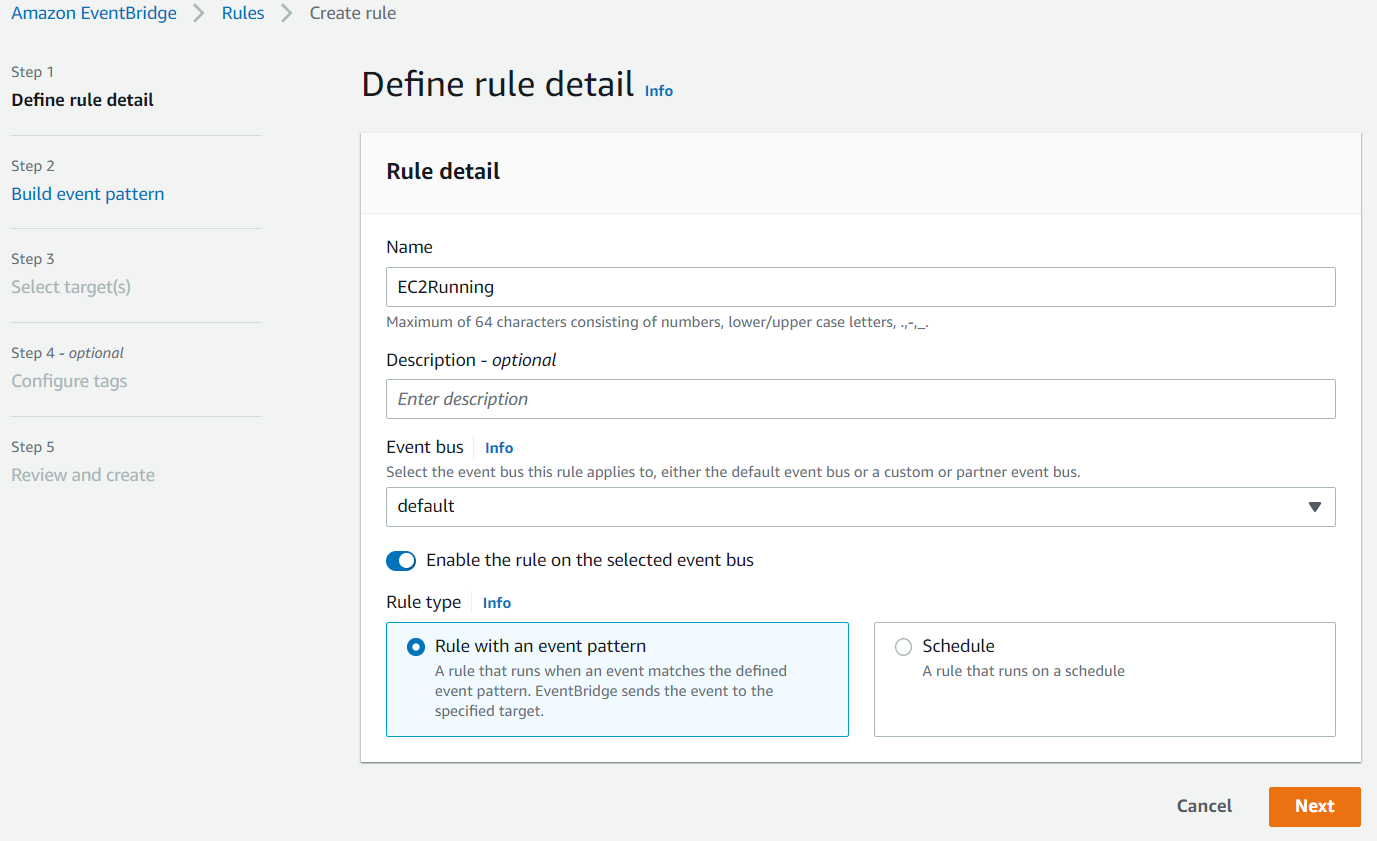
Enter something like EC2Running in the Name field and click Next:
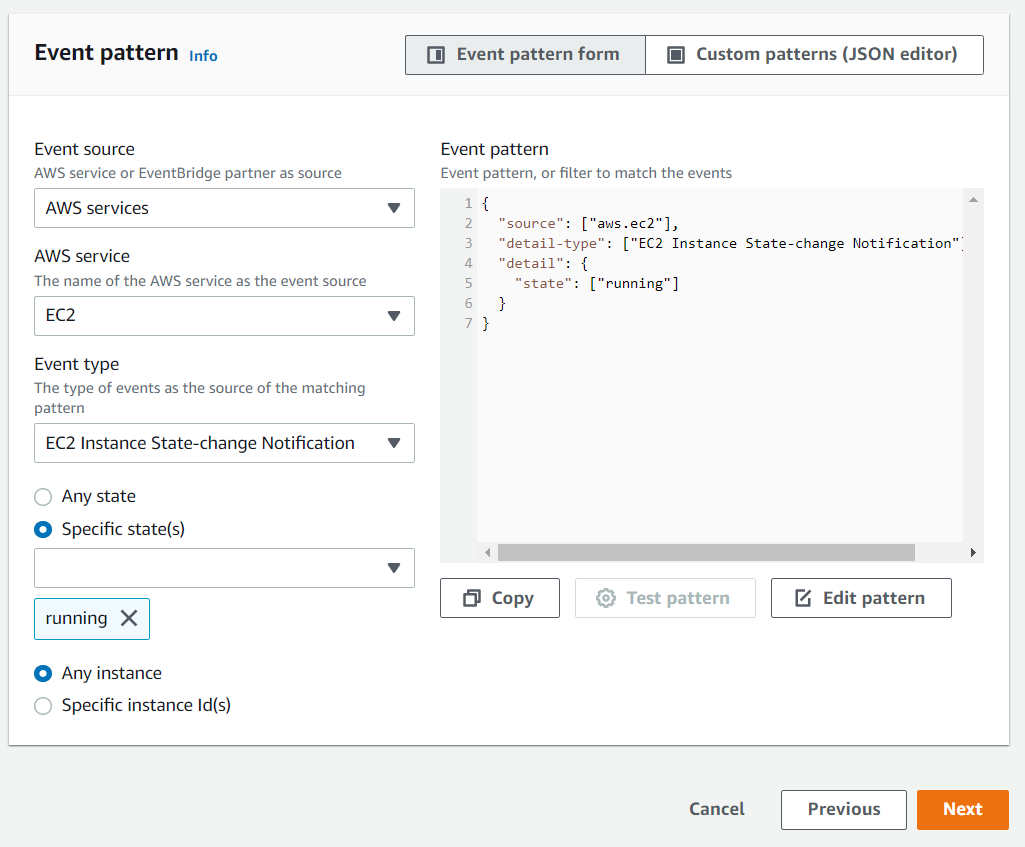
Scroll down to the Event pattern section. Under the AWS service section, select EC2 from the drop-down list, EC2 Instance State-change Notification from the Event Type drop-down list, select the Specific state(s) option, and select running from the drop-down list, and click Next:
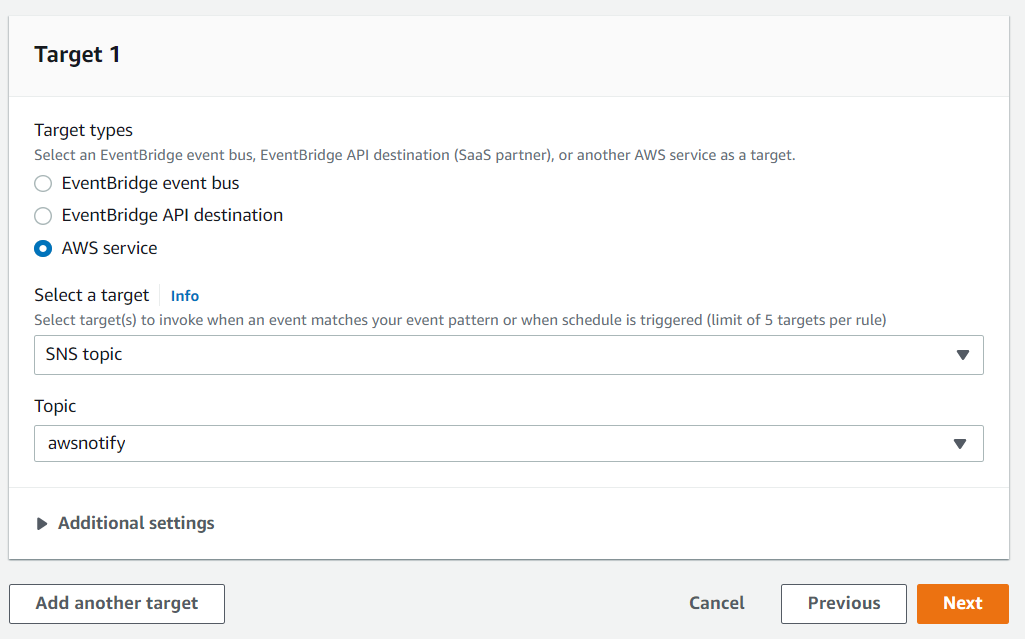
Under the Target section, select SNS topic from the first drop-down list and awsnotify from the Topic drop-down list, then click Next:
Click Next for the Configure tags section, then click Create rule.
You will now receive an email notification whenever an EC2 instance switches state into the running state, which is when the instance is ready for use.
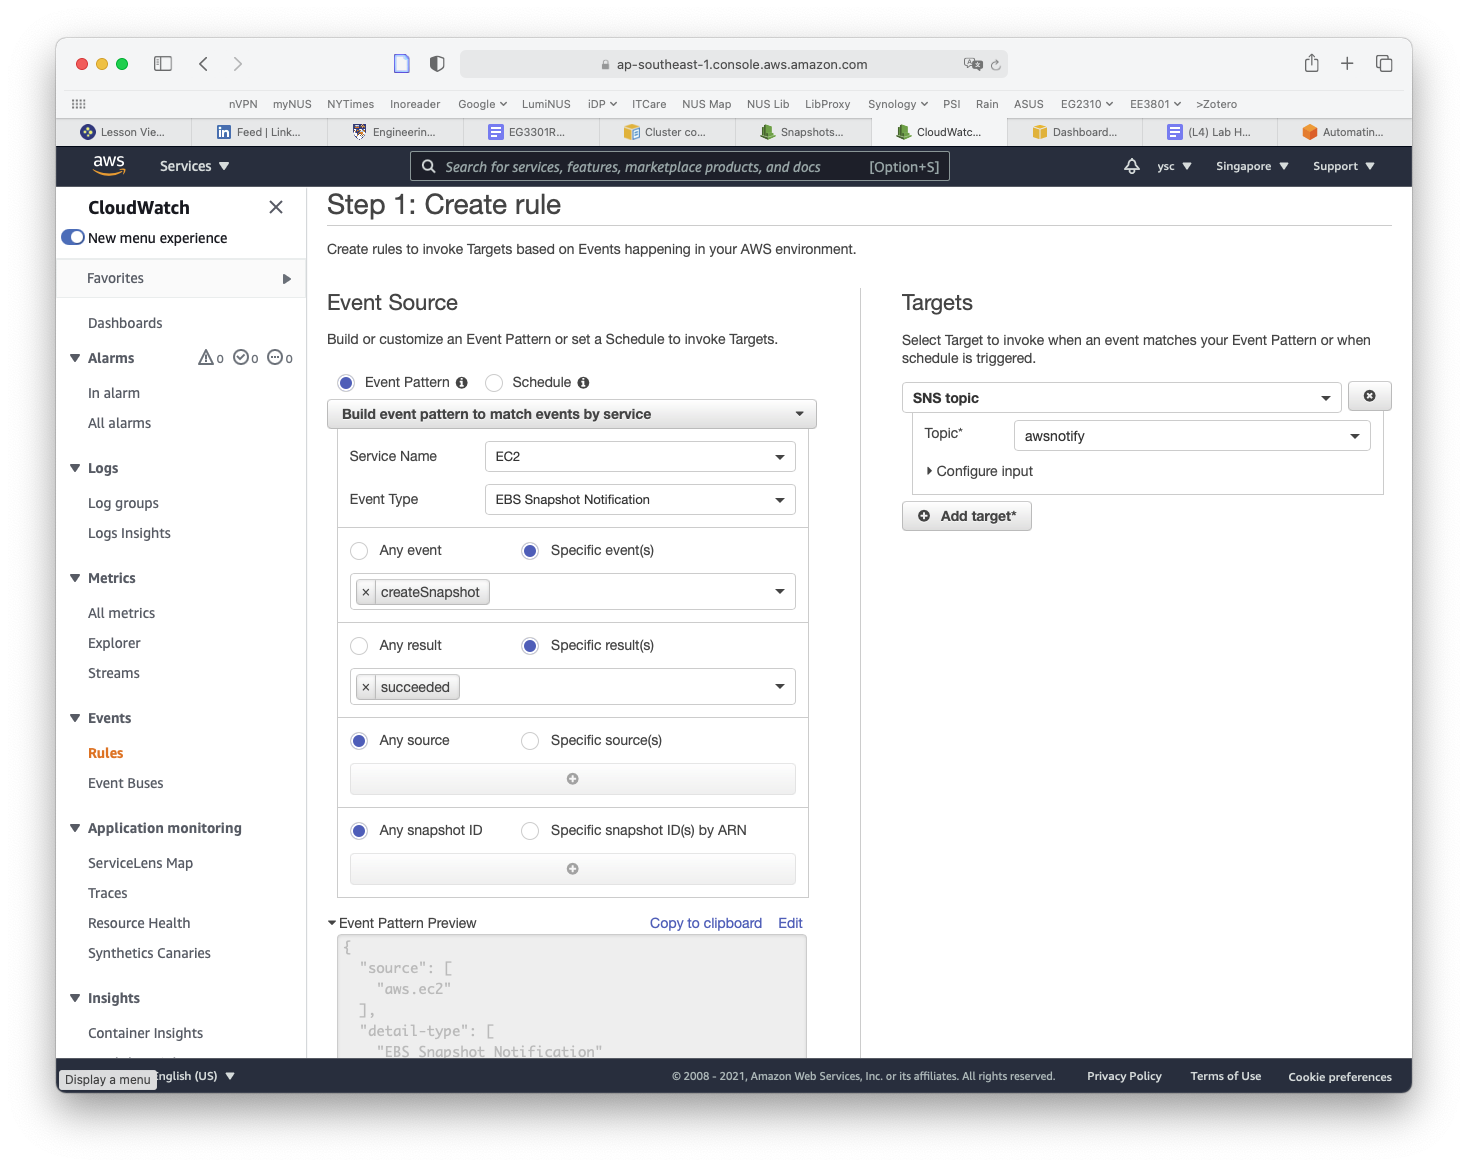
While you are here, we will set up another rule to notify you when EC2 snapshots are completed, which you will use later to back up your work. Click on the Create rule button again from the Rules landing page. This time, type SnapshotComplete for the rule name, select EC2 for Service Name, EBS Snapshot Notification for Event Type, createSnapshot for Specific event(s), and succeeded for Specific result(s) (as shown below). Check that the same options as above are selected under the Target section. Then click on the Create rule button.
You will now also receive an email when a snapshot is completed.
15.
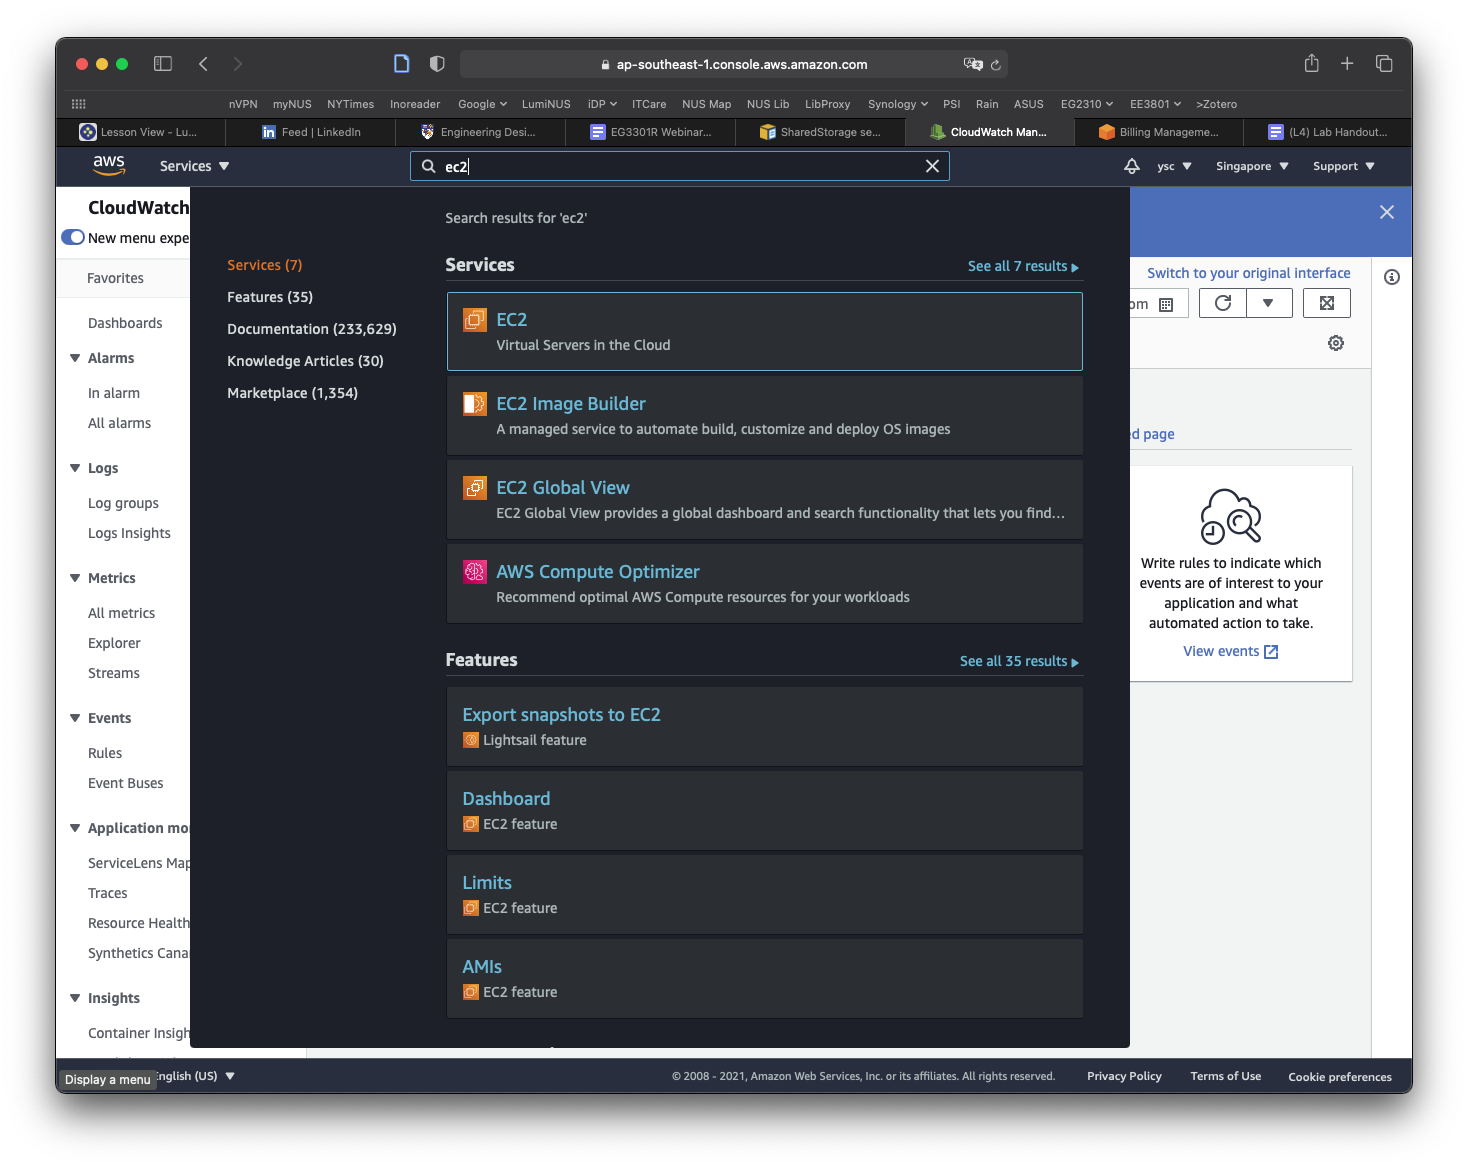
The final thing you will have to do before you create your cluster is to make a copy of the snapshot containing the data that you will be working with for the remaining labs. You can find the snapshot by typing EC2 into the search bar and select EC2 in the drop-down list:
Click Snapshots in the left panel:
Click on the Owned By Me button to reveal the drop-down menu and select Public Snapshots. Copy and paste the following snapshot id: snap-0e87df4e208383a50, and then hit Return. You should see a snapshot with the description condaenvs listed and selected.
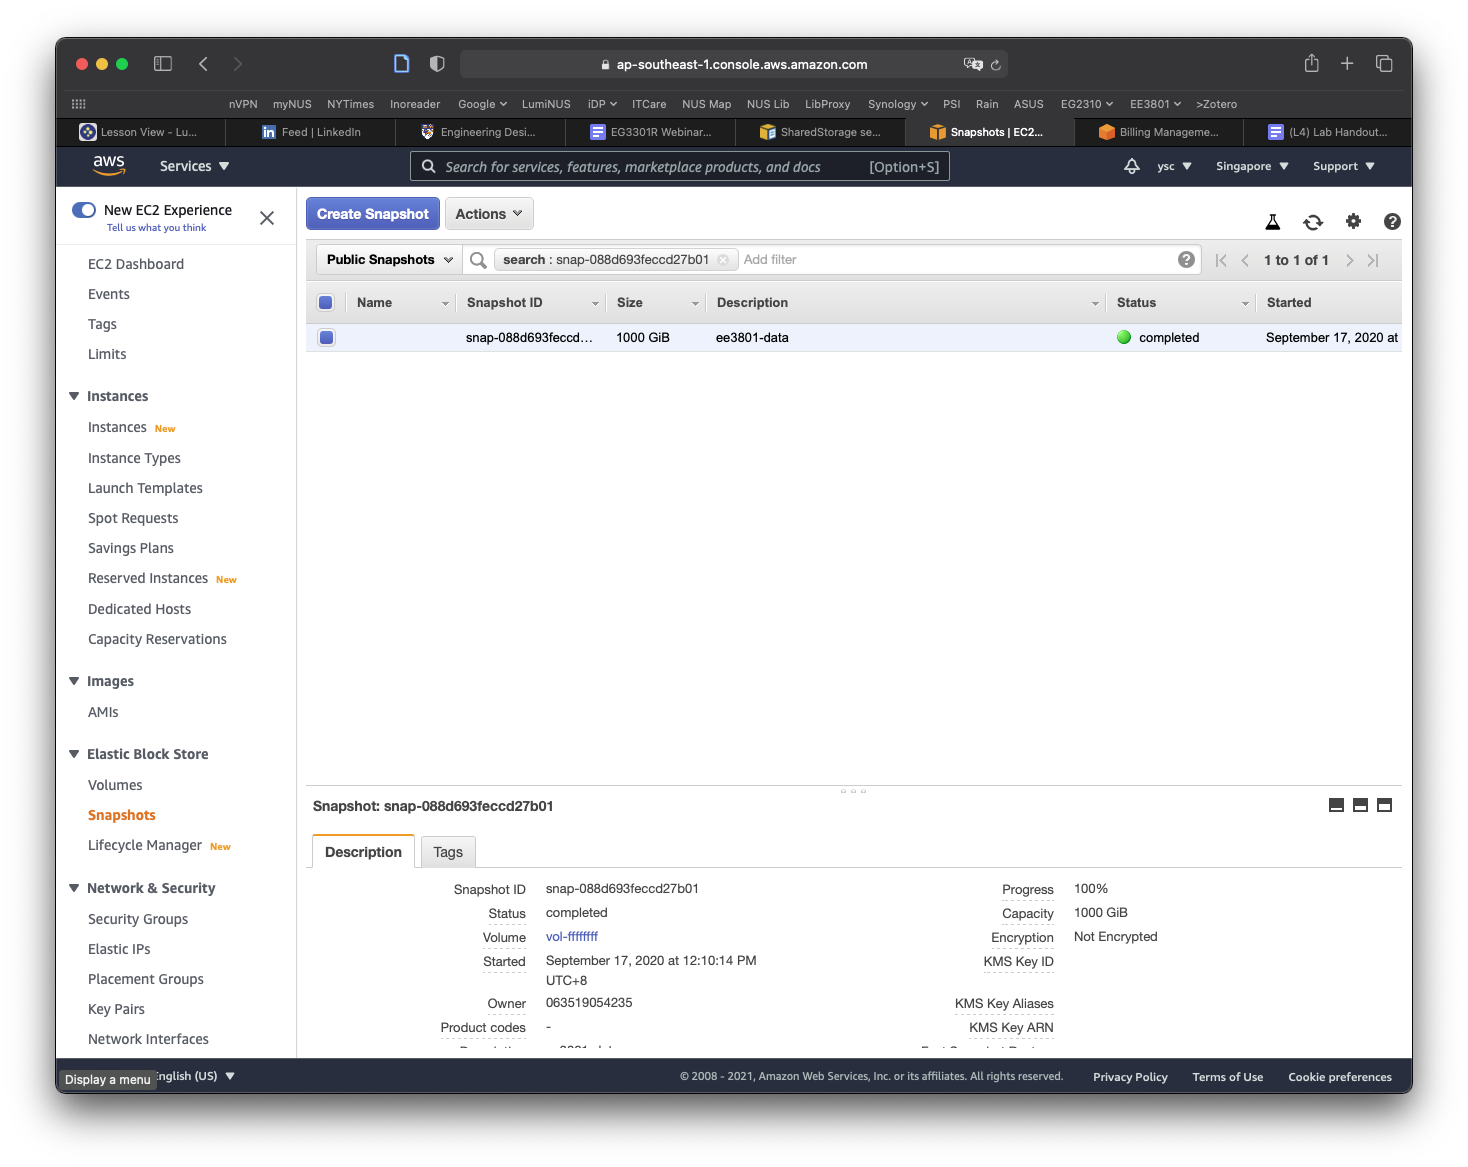
Click on the Actions button, and select the Copy command. In the window that appears, replace the description with data, make sure the Encrypt this snapshot option is NOT selected, and then click the Copy button. You should see a message that the snapshot is being copied.
Click on the Public Snapshots button to select the Owned By Me option, and then click on the x icon in the search field to remove the snapshot id. You should now see a snapshot with a size of 1000 GiB with the description data. If the snapshot is not selected, select it, and you should see more information for the snapshot shown in the panel at the bottom of the window. Move your cursor over the text Snapshot ID, which will cause a Copy to clipboard icon to appear. Click on it to copy the Snapshot ID.

Use nano to edit the cluster-config.yaml file and paste the Snapshot ID into the SnapshotId field (be sure to add a space after SnapshotId:):
SharedStorage:
  - MountDir: data
    Name: ee3801
    StorageType: Ebs
    EbsSettings:
      Size: 1000
      Encrypted: false
      SnapshotId: snap-xxxxxxxxxxxxxxxxx
Task
Take a screenshot of your Nano window showing the
SnapshotIDabove and include it in your lab report.
Save the file and exit nano.